Showing posts with label salt. Show all posts

Monday, May 13, 2019

Garlic Butter Rice with Kale


Garlic Butter Rice with Kale is my new favorite side dish. Think beyond the normal kale salad and make this amazing side dish full of nutritious kale.

Considered to be a "super food" kale is so very good for you. Here are just some of the health benefits of kale:

  • exceptionally high amount of Vitamins A, C and K
  • high in antioxidants
  • help lower cholesterol which can reduce the risk of heart disease
  • it has cancer fighting substances
  • an excellent source of minerals that many people don’t get enough of, including calcium, potassium and magnesium
  • So this kale recipe is an excellent delicious way to get more nutrition into your diet!


This Garlic Butter Rice with Kale is so good my husband even ate it, and liked it, and he is not a veggie fan. That was a win-win to me!

You may also like:
Kale and Strawberry Salad with Strawberry Vinaigrette


RECIPE
Ingredients
4-5 cups chopped fresh kale
1 tablespoon olive oil
salt and pepper to taste
1 cup uncooked rice
2 cups chicken bone broth
3 tablespoons butter, reserving 1 tablespoon
2 tsp garlic powder

Method
Remove kale from stems, roll leaves up cigar style and slice thin ribbons then chop. Place the kale in a large bowl and rub with the olive oil, salt and pepper. Set aside.

Cook rice in a rice steamer (or on your stove top) with the chicken bone broth, 2 tablespoons butter and garlic powder.

Once rice is fully cooked, fluff with a fork. Add kale, remaining 1 tablespoon of butter and stir to combine. Cover steamer and let sit on "keep warm" for approx. 15 minutes. Alternately, if you cooked the rice on your stove top, remove from heat, add kale and let sit covered 15 minutes.

Serve as a side dish with most any roasted or grilled meats. We loved it with fried chicken breasts and garlic cheese biscuits.

Yield: 4 servings

Enjoy,
Mary

© Cooking with Mary and Friends. Unauthorized use and/or duplication of this material without express and written permission from this blog’s author and/or owner is strictly prohibited. Excerpts and links may be used, provided that full and clear credit is given to Cooking with Mary and Friends with appropriate and specific direction to the original content.

Wednesday, October 24, 2018

Rack of Lamb


Growing up in New England, we had lamb quite often, from leg of lamb and lamb chops, to rack of lamb. It's a nice alternative to beef, and has a wonderful taste. Some people believe lamb has a "gamey" taste, and that is not true at all if you buy a good piece of lamb. It should not smell or have any gamey taste.

I personally really like supporting our local farms and buy our lamb often from them. You get to know the farmer, it's a superior product, and you are keeping your dollars local when you shop local. To me it's always a "win-win" and you simply can't beat the freshness when you support local.


If buying lamb from a local farm is not available to you, finding and buying lamb is easy; it’s widely available at grocery stores, specialty food retailers and butcher shops. Look for American lamb with a soft pink to red coloring with white marbling. Most likely, fresh chops, steaks and racks are displayed, but if you don’t see lamb, just ask.


LAMB NUTRITION FACTS

  • Forty percent of the fat in lean cuts of lamb is monounsaturated, the same kind of fat found in olive oil.
  • A 3-ounce serving of lamb provides nearly five times the essential omega-3 fatty acids and alpha linoleic acid of a 3-ounce serving of beef. Three ounces of lamb fits easily within the daily fat, saturated fat and cholesterol recommendations of the Dietary Guidelines for Americans.
  • On average, 3-ounces of lamb fits easily within the daily fat, saturated fat and cholesterol recommendations of the Dietary Guidelines for Americans.
  • On average, 3-ounce serving of lamb meets the Food and Drug Administration’s (FDA) definition for lean meat:  fewer than 10 grams of fat, 4.5 grams of saturated fat, and 95 milligrams of cholesterol per 100 grams, or 3.5 ounces.
  • Recent research suggests that eating protein can help preserve lean body mass when you’re trying to lose weight. An average 3-ounce serving of lamb, which has 175 calories and meets nearly half of your daily protein needs, encourages feelings of fullness that may prevent overeating, a combination key to weight management.
  • No artificial or synthetic growth hormones are used in lamb production in the U.S. Lean, satisfying, nutritious: American Lamb is nutritious and satisfying.

RECIPE
Ingredients
1 Rack of Lamb
1 tsp fresh minced rosemary
1 tsp minced garlic
salt and pepper

Method
In a small bowl, mix herbs and spices. Rub all over rack of lamb and place rack on a pre-heated grill over indirect medium heat.

Grill meat side down 7-10 minutes, turn to rack side down, and grill 10-15 additional minutes or until the internal temperature is 145 degrees.

Remove from grill, let rest 5 minutes before serving. Slice rack into individual chops, or 2 chops each and serve while hot.

Mmmm mmmm finger licking good!!


Enjoy,
Mary

© Cooking with Mary and Friends. Unauthorized use and/or duplication of this material without express and written permission from this blog’s author and/or owner is strictly prohibited. Excerpts and links may be used, provided that full and clear credit is given to Cooking with Mary and Friends with appropriate and specific direction to the original content.

Wednesday, March 28, 2018

Amish-Style Macaroni Salad


This is the BEST Amish-Style Macaroni Salad EVER! I have tried for a long time to make an Amish-Style Macaroni Salad with the best blend of sweet and tart, and this does it.

The dressing is perfect. It's an awesome blend of creamy, sweet and tangy, and you'll never believe what the secret ingredient is ... seriously. When you find out you'll be surprised, maybe doubtful, and possibly even have an "ah ha" moment ... for real.


I mean seriously, what has taken me so long, and where has this been all my life? I could NOT believe it could be so simple ... should I tell you?

Three words ... sweetened condensed milk. Yes, you read that right ... sweetened condensed milk. What could be easier? It's thick, creamy, sweet and works amazingly well with the mayonnaise, vinegar, salt and pepper. Just wait until you try it, you'll be surprised too.


RECIPE
Ingredients
16 ounces (2 cups) uncooked elbow macaroni
4 carrots shredded (I use my food processor, but a box grater will work)
1 onion, chopped
1 small head broccoli, shredded (optional)
1/2 each red or yellow and green bell pepper, seeded and chopped (optional)
1 cup chopped celery (approx 2 stalks)
1 tbls. parsley flakes
2 cups mayonnaise
1 (14 ounce) can sweetened condensed milk
1/2 cup white vinegar
salt and pepper to taste

Method
Bring a large pot of lightly salted water to a boil. Add macaroni, and cook until just done, about 8 minutes. Rinse under cold water, and drain.

In a large bowl, stir together the shredded carrots and broccoli, onions, green pepper, red pepper and celery.

Mix in the mayonnaise, condensed milk, vinegar, parsley flakes, salt and pepper. Add the macaroni, toss gently, cover and refrigerate for at least 8 hours.

Cook's note - Best made the day before. Stir occasionally to blend flavors. Macaroni will absorb more of the dressing as it sits.

Also seen on Meal Plan Monday

Enjoy,

Mary

© Cooking with Mary and Friends. Unauthorized use and/or duplication of this material without express and written permission from this blog’s author and/or owner is strictly prohibited. Excerpts and links may be used, provided that full and clear credit is given to Cooking with Mary and Friends with appropriate and specific direction to the original content.

Monday, March 26, 2018

Rustic Dutch Oven Bread


I just love rustic breads; their crusty exterior and light, chewy, full of nooks and crannies interior begging for some real butter to be spread on top of every slice.


Dutch ovens are an awesome way to bake a large loaf of rustic bread to be enjoyed with soups, stews, warm slathered with butter, toasted with jam, or used in hearty sandwiches.


No overnight rising required. This bread rises and bakes in the same day with just 4 ingredients: flour, salt, water, yeast! That's it! Yes, it does still take a few hours to make; there's just no way around that, but during the rising times, you can be doing something else, and then you'll be able to enjoy this rustic artisan dutch oven bread for supper.

Pass the butter please!


RECIPE
Ingredients
4 cups all-purpose flour
2 cups water, lukewarm, between 90-110 degrees 
1 1/2 tsp salt
1 envelope active dry yeast (or 2 1/2 tsp yeast)

Method

Stir yeast packet into water and allow yeast to bloom (bubble some) about 10 minutes.

In a large bowl, mix flour and salt by hand. Once incorporated, create a small well in the middle and pour in the water/yeast mixture. Mix by hand, wetting your working hand before mixing so the dough doesn’t stick to your fingers. The water and flour should come together and a form rough dough that pulls away from the sides of the bowl.


NOTE: If the dough is too sticky, add more flour in small increments, about 1 tablespoon at a time. If the dough is too dry, add more water, 1 tablespoon at a time.


Once the dough has come together, cover it and let it rise until it doubles in size, 1 1/2-2 hours.


Uncover the dough and give it a few pokes with your finger. If the dough has risen properly it should indent under the pressure of your fingers and slowly deflate.


Using a rubber spatula fold the dough. Starting from the rim of the bowl, work the dough loose from the sides and fold it up and towards the center of the bowl. Turn the bowl 90 degrees, and repeat until all the dough has been pulled from the sides and folded towards the center. Once finished, cover and allow the dough to continue to rise for another 1 1/2-2 hours.


Once the dough has doubled in size again, gently remove it from the bowl onto a lightly floured surface. Sprinkle a small amount of flour on top of the dough. Using your hands, begin to shape the loaf. Fold the dough under itself several times to form a ball, then clap together the seams of dough underneath. Place the dough seam-side down in a clean bowl that has been coated with olive oil and flour; Cover and let rise for 1 hour.


Meanwhile, take a 6-quart dutch oven (or heavy cooking pot with oven-safe lid) and place it inside the oven. Preheat the oven to 450 and allow it to heat up with the pot inside for 45 minutes. Remove the pot from the oven and place it on a trivet or heat-safe surface (be careful, it will be very hot).


Turn the proofed dough over onto a piece of parchment paper lightly sprayed with cooking spray, and carefully place it, parchment paper and all, inside of the pot. Cover with the lid and return the pot to the oven.


Bake at 450 for 30 minutes, remove lid and bake 15 minutes more (45 minutes total baking time).


Remove bread from pot and allow to cool for 10 minutes before cutting.

Total time: 6 hours

Also seen on Meal Plan Monday

Enjoy,

Mary

© Cooking with Mary and Friends. Unauthorized use and/or duplication of this material without express and written permission from this blog’s author and/or owner is strictly prohibited. Excerpts and links may be used, provided that full and clear credit is given to Cooking with Mary and Friends with appropriate and specific direction to the original content.

Sunday, February 11, 2018

Bradford Collard Salad w/ Peanut Vinaigrette


The end of 2017 was the first time Bradford collards were sold outside the family in generations of cultivation. Quickly after their release to the public, they became very much in demand, becoming prized possessions in many chef's kitchens all around the state. I'm so happy I'm one of the lucky ones who've been able to try these tender, sweet and delicious collards. Thanks Bradford Family!


First I used them in a collard slaw and now this delicious collard salad. Who would have ever guessed collards could be so tender you could eat them raw? I know I never would have until now.


Fresh heirloom Bradford Collards and Carolina African Runner Peanut Vinaigrette is just a match made in heaven. Here collard greens are served fresh and raw, dressed with the peanut vinaigrette, topped with carrot ribbons, and garnished with farm fresh hard boiled egg quarters.


Serve this salad with a side of Anson Mills Black Skillet Cornbread, and you have an awesome lunch or main meal side dish; so delicious and satisfying.


Saturday, August 19, 2017

Sweet Watermelon Rind Pickles


When your farm friend, Nat Bradford, is bringing back his family's heirloom watermelon right in your backyard you do two things; one is go visit the farm to see and hear for yourself first-hand about it, and the second is you anxiously await the new harvest so you can buy one of these awesome watermelons for yourself. Of course you can use any watermelon rind you have locally available to make these yummmy pickles.

Nat Bradford, me, and a gorgeous 30 lb Bradford Watermelon

The Bradford Watermelon has been grown in Sumter County, South Carolina for about 170 years and has a fascinating history. Read all about my first trip to the Bradford's farm.


Determined there would be no waste of this gorgeous watermelon, I decided to make Watermelon Rind Pickles. So sweet, yet tangy and soft, with a nice texture, they are not mushy at all, and are so delicious. Serve them on a cheeseboard with some shaved prosciutto or other thinly sliced deli meat, with a variety of cheeses and crackers. Yummmm!


RECIPE
Ingredients
3 quarts (about 6 pounds) watermelon rind, unpared
¾ cup salt
3 quarts water
2 quarts (2 trays) ice cubes
9 cups sugar
3 cups white vinegar
3 cups water
1 tablespoon (about 48) whole cloves
6 cinnamon sticks, 1 inch pieces
1 lemon, thinly sliced, with seeds removed

Method
This is a 2 day process 
Day One:
Trim the pink flesh and outer green skin from thick watermelon rind. Cut into 1 inch squares or fancy shapes as desired. Cover with brine made by mixing the salt with 3 quarts cold water. Add ice cubes. Let stand 3 to 4 hours.

Drain; rinse in cold water. Cover with cold water and cook until fork tender, about 10 minutes (do not overcook). Drain.

Combine sugar, vinegar, water, and spices (tied in a clean, thin, white cloth). Boil 5 minutes and pour over the watermelon; add lemon slices. Let stand overnight in the refrigerator.

Day Two:
Heat watermelon in syrup to boiling and cook slowly 1 hour. Pack hot pickles loosely into clean, hot pint jars. To each jar add 1 piece of stick cinnamon from spice bag; discard lemon slices, and cover with boiling syrup, leaving ½ inch head-space.

Remove air bubbles and adjust head-space if needed. Wipe rims of jars with a dampened clean paper towel; adjust two-piece metal canning lids. Process half-pints or pint jars 10 minutes in a boiling water bath or steam canner.

Yield: 4-5 pints

Original recipe from the National Center for Home Food Preservation


Enjoy,
Mary

© Cooking with Mary and Friends. Unauthorized use and/or duplication of this material without express and written permission from this blog’s author and/or owner is strictly prohibited. Excerpts and links may be used, provided that full and clear credit is given to Cooking with Mary and Friends with appropriate and specific direction to the original content.

Wednesday, April 26, 2017

Quick Pickles - April Challenge


A group of us are participating in a year long Food in Jars Mastery Challenge hosted by Marisa of Food in Jars, and April was Quick Pickle Month.

So what is a quick pickle? Quick pickles are also known as refrigerator pickles. They are simply vegetables (or fruits) that are pickled in a vinegar, water, and salt (sometimes sugar, too) solution and stored in the refrigerator. Quick pickles don't develop the deep flavor that fermented pickles do, but they also only require a few days in the brine before they can be enjoyed. Quick pickles also do not require canning when refrigerated.

Cool, briny pickles straight from the fridge are one of the simplest pleasures of summer. Quick pickling is also a brilliant solution for preserving a plethora of vegetables from the market or your garden. Quick pickling doesn't require canning or a bushel of vegetables. Best of all, you can adapt this simple formula for any fresh vegetables; try a mixture of vinegars and spices for a truly custom pickle pleasure.

Pickling is best done with super-fresh vegetables or fruits. Save the slightly bruised specimens for soups or other forms of preservation. Almost any vegetable or fruit can be pickled, and the shape you choose to pickle in is entirely up to you. For example, carrots can be peeled and sliced into matchsticks or coins. Cherry tomatoes are best preserved whole. Green vegetables, such as green beans or asparagus, can be blanched in boiling water for two to three minutes and then shocked in an ice bath to preserve their color, but this step is purely optional. (source: The Kitchn)

So off we set to make Quick Pickles! It was fascinating to see what each of us came up with. We had everything from pickled avocado, to broccoli, garlic, 3 bean salad, green beans, zucchini, cauliflower, eggs, peas and carrots and so much more! Just take a look!

Thursday, April 20, 2017

Crunchy Dill Pickles


Finally I have crunchy dill pickles. I have tried all kinds of recipes, and while I enjoy all the ones I've made, I love this one for their tangy, crunchy dill flavor!


I've always wondered if salting was the key, and it certainly is, just as I discovered last year when I made my Old Fashioned Southern Squash Pickles. What a difference some time in salt water makes! You have to try it to believe it.


RECIPE
Ingredients
8 lbs of 3 to 4-inch pickling cucumbers
2 gals water
2/3 cups canning or pickling salt; divided
1 1/2 qts vinegar (5 percent)
1/4 cup sugar
2 quarts water
2 tbls whole mixed pickling spice
Whole mustard seed
Dried minced dill -or- dill seed

Method
Wash your cucumbers and thinly slice off the blossom end. (the blossoms have an enzyme that will make your pickles soft). Cut into spears or leave whole.

Add 1/3 cup salt dissolved in 2 gallons water. Soak cucumbers in water for 2-3 hours, covering bowl with plastic wrap, and letting sit on your kitchen counter-top. Drain, but do not rinse.

Combine vinegar, 1/3 cup salt, sugar, and 2 quarts of water. Place pickling spices in a cheesecloth, or in a mesh strainer that fits inside your pan below the surface of the liquid, and place in your vinegar brine. Heat to boiling.

Fill pint/quart jars with drained cucumbers, packing tightly. Add 1 tsp mustard seed and 1 tsp dill weed or dill seed per pint (double for quarts). Fill jars with hot pickling brine (discarding pickling spice), leaving 1/2-inch head-space. Cover with lids and rings and process pints 10 minutes and quarts 15 minutes in boiling water bath or steam canner.

Remove jars and let cool on a kitchen towel on your counter-top 24 hours. Store in pantry up to one year. Open jars must be refrigerated.

Cook's note - If using a boiling water bath, bring water to almost a boil before adding jars so you don't add too much extra time waiting for water to boil. For optimum flavor, do not open for 4 weeks. Patience is key!


Yield: approx. 9 pint jars or 4 quarts.

Also seen on Meal Plan Monday

Enjoy,
Mary

© Cooking with Mary and Friends. Unauthorized use and/or duplication of this material without express and written permission from this blog’s author and/or owner is strictly prohibited. Excerpts and links may be used, provided that full and clear credit is given to Cooking with Mary and Friends with appropriate and specific direction to the original 
content.

Thursday, February 16, 2017

Sauerkraut Made Easy!


I am participating in the year long Food in Jars Mastery Challenge and February was salt preserving. While there are many ways to use salt in preserving, from lemons to herbs, egg yolks and flavored salts, I chose to salt preserve some sauerkraut.


My husband enjoys sauerkraut, and I must admit while I like the flavor, store bought sauerkraut doesn't always agree with me, but salt preserved sauerkraut is teeming with "good for you" healthy bacteria, which is an excellent way to boost your gut health, and it's so easy to make ...  much easier than I anticipated.


What do you need? A small'ish head of cabbage a tablespoon of salt, a mason jar and a weight. That's it, that's all there is to it. Well, that and time as the sauerkraut must ferment on your kitchen counter-top for approximately 3 weeks. The ideal room temperature for making sauerkraut is 65-72 degrees, no warmer, which is why its typically made in the cooler fall and winter months, and not in the summer. After it's fermented, it can be stored in your refrigerator for months, some say up to a year.


Tuesday, January 17, 2017

Sugar Candied Peanuts


I had never candied anything other than pecans until I did these the other day. Of course it's no harder to do than than the Cinnamon Sugar Candied Pecans ... I guess I never really thought about it. Then I made some Honey Roasted Peanuts for my husband, and he asked if I could candy some peanuts like I did the pecans, and I thought, why not?


Naturally you can do this with any nuts you like, or a mixture of nuts. They make a great little snack, addition to baked cookies, a nice crunch in trail mix and more. PLUS they're so easy and inexpensive to do, and store well for several weeks in a tightly sealed container such as a mason jar.


RECIPE
Ingredients
1/4 cup (1/2 stick) butter, melted
2 egg whites
1 tbsp water
1 1/2 cups sugar
1 tsp salt
5 cups peanuts (cashews, almonds, walnuts, pecans or any combination)

Method
Preheat oven to 300 degrees. Line a 13 x 18-inch sheet pan (that has sides) with heavy duty aluminum foil. Pour on melted butter and spread out so that pan is evenly coated.

In a large bowl, use an electric mixer to beat egg whites and water until stiff peaks just start to form. Blend in sugar and salt. Fold in peanuts and spread mixture in a single layer onto prepared pan (it's going to look like a sticky, gooey mess - trust me, it'll all work out).

Bake for approximately 30 stirring and flipping peanuts every 10 minutes (I use a wooden spoon or rubber spatula). Watch nuts very closely during the last 10 minutes of cooking time, removing them from oven sooner if they are getting too dark. Nuts are done when they are mostly dry and golden brown. The peanut and egg white mixture will be very wet and gooey at first. Do your best to flip the peanuts and spread them back out into a single layer the first few times that you stir them. After the first couple of times, you'll see them start to come together and look more like the finished product.

Allow peanuts to cool on pan until they are completely dry and crunchy, stirring occasionally to break them up. Store in an airtight container for two to three weeks.

Cooks  note - Sugar burns quickly. Be sure to stir every 10 minutes and keep a close eye on them.

You may also like: Cinnamon Sugar Candied Pecans

Enjoy,

Mary

© Cooking with Mary and Friends Unauthorized use and/or duplication of this material without express and written permission from this blog’s author and/or owner is strictly prohibited. Excerpts and links may be used, provided that full and clear credit is given to Cooking with Mary and Friends with appropriate and specific direction to the original content.

Wednesday, December 14, 2016

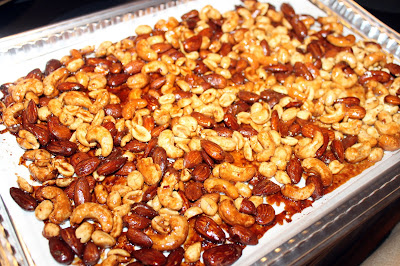
Honey Roasted Mixed Nuts


Who knew it could be so easy to make your own honey roasted mixed nuts at home? I recently purchased raw organic cashews and almonds from SC Real Foods and this was the perfect thing to do with them.


These Honey Roasted Mixed Nuts take no time to make. You just have to have a bit of patience and spend some time breaking them apart as they cool, other than than they literally take just minutes to do.


Lamb Meatballs with Pineapple Barbecue Sauce


We recently ordered a whole lamb we had processed from Old McCaskills Farm because we love lamb, and buying meat in bulk (when you can) is so much more affordable. When you purchase the lamb this way, you also get to choose your cuts, specializing it to your particular tastes or needs.

Lamb is a delicious alternative to other meats, such as beef, and the best lamb comes from small local family farms who dedicate themselves to raising the very best lambs they can. All organic, no antibiotics or added growth hormones, raised humanely on pasture, it is the best of the best.


What are the health benefits of lamb?  
  • Lamb meat is an excellent source of high quality protein.
  • Lamb meat is an ideal source of iron. An average portion can provide 20 per cent of the recommended daily intake for men and 12 per cent for women. The iron found in lamb meat and other red meat is in a form that is easily absorbed by the body. The inclusion of iron in the diet is vital in the formation of red blood cells.
  • Lamb meat provides 45 per cent of the daily requirement of zinc, essential for growth, healing and a healthy immune system. Like iron, the zinc found in lamb meat is more easily absorbed by the body than zinc found in other sources.
  • Lamb meat is a great source of B vitamins, essential for metabolic reactions in the body. It can provide over 100 per cent of the daily requirement of B12 and is a good source of thiamine.
  • Lamb meat also contains trace elements such as copper, manganese and selenium.
  • As a result of breeding developments, feeding practices, butchery methods and trimming, the fat in lamb meat has been greatly reduced over the past 20 years. For example, Lamb Leg Steaks may contain as little as 5.1 per cent fat.
  • Half the fat in lamb meat is unsaturated, which is good for you. Most of the unsaturated fat is monounsaturated, commonly found in the healthy 'Mediterranean-type diet'
Don't want to buy a lot of lamb, or want to go with one of the least expensive, yet most versatile "cuts" of  lamb, try ground lamb. Use it in place of ground beef or pork  in any of your favorite recipes for a delicious twist. That's what I did the other night when I made these delicious lamb meatballs. Who knew barbecue sauce and pineapple could be so good together?

Sunday, December 4, 2016

Homemade Condensed Cream of Mushroom Soup


Who knew making your own Condensed Cream of Mushroom Soup could be so easy? Why has it taken me this long to realize this? So easy, it's crazy easy and so few ingredients you too will wonder why you never made it ... seriously ... you will!


I've always wanted to do this, then my local produce market had fresh organic button (white) mushrooms, and I had center-cut pork chops from a local farm just begging for me to make stuffed pork chops with, so I set out to figure out how to make my own. Of course I poured over every recipe on the Internet and finally settled on one from the Pioneer Woman, which this is slightly adapted from.


RECIPE
Ingredients
1/4 cup butter
3/4 cup (6 oz) fresh button mushroom, finely diced
1/4 cup onion, finely diced
1 clove garlic, minced
salt and pepper to taste
1/4 cup all-purpose flour
1/2 cup heavy cream
1/2 cup chicken or beef bone broth (I used beef bone broth)

Method
Melt butter in a skillet over medium-low heat. Add mushrooms and onions and sauté until tender, about 8 minutes. Season to taste with salt and pepper (I like to use course-ground pepper)

Add garlic and cook for 2 minutes. Add flour and cook for an additional 2 minutes. Quickly whisk in cream and chicken broth until smooth. Bring to a boil and boil for 1 minute. Remove from heat. Taste and adjust seasoning if needed; you want it to be saltier than normal, since it is condensed.

Allow to cool slightly before transferring to a jar or freezer-safe container. Once soup is completely cool, you can store it in the refrigerator or freezer.

To reconstitute, add 1 1/2 cups of liquid, such as chicken or beef bone broth, milk, water, or a combination.

Note: A 10 3/4-ounce can of condensed mushroom soup is about 1 1/4 cups. This recipe makes about 1 1/2-2 cups of condensed soup.

Enjoy,
Mary

© Cooking with Mary and Friends. Unauthorized use and/or duplication of this material without express and written permission from this blog’s author and/or owner is strictly prohibited. Excerpts and links may be used, provided that full and clear credit is given to Cooking with Mary and Friends with appropriate and specific direction to the original content.


Tuesday, September 27, 2016

Journey Cakes { a 1775 vintage recipe }

A few weeks ago my friend, Kathy, at Old McCaskill's Farm gave me a bag of Rice Flour form Carolina Plantation Rice because she knew I would use it, make something with it and share the recipe. I guess she knows me pretty well! On the tag on the back of the rice flour was this recipe for Journey Cakes, a circa 1775 recipe from South Carolina. Well right then and there I just knew I had to make them.


What in the world is a Journey Cake?  Legend has it, these cakes would help sustain travelers while they journeyed for long distances, so if you're getting ready to go somewhere, make sure you pack a few of these along! Once I made them I saw this made perfect sense. They are light, nutritious and very portable because they are small. Nowadays they are largely used as a side dish to and grilled or roasted meat.


Carolina Plantation’s White Rice Flour is carefully ground to a fine consistency in our century-old stone-buhr grist mill. We use only our most aromatic rice for this flour to produce a smooth texture and unforgettable taste. Rice flour is a favorite ingredient for gluten-free baking. They also use this flour in our award winning fish fry. 


Carolina Plantation Rice comes to you from the only colonial plantation in the Carolinas to grow rice for commercial sale: Plumfield Plantation on the Great Pee Dee River. This special grain has an aroma and taste that you won't find in any normal grocery store variety. Once you've tasted it, you'll never go back to your current brand. 


Carolina Plantation reintroduced aromatic rice to South Carolina in 1996. With rice once again in her fields, Plumfield Plantation proudly serves a truly distinctive taste of the 18th century southern rice plantations. (source: Carolina Plantation Rice)


RECIPE
Ingredients
2 cups cold cooked Carolina Plantation rice
2 large eggs, lightly beaten
2 cups milk
1 cup Carolina Plantation rice flour
1 1⁄2 tablespoons butter, melted
2 tsp salt

Method
Preheat oven to 400. Stir together rice and next 5 ingredients in a large bowl. The batter will be very thin.

Fill greased muffin tins 1/2-3/4 full with batter and bake 18-20 minutes or until brown around edges.

Rosemary-Garlic Journey Cakes: Add 1/4 cup finely chopped fresh or dried rosemary and 1 tablespoon finely chopped garlic to batter - this is the option I baked. I also added some shredded cheddar cheese to a couple for variety.

Tomato, Parmesan, and Kalamata Olive Journey Cakes: Add 1 tomato, seeded and finely chopped; 1/2 cup shredded Parmesan cheese; and 1/4 cup minced Kalamata olives to rice mixture.


You can watch a video here from America's Heartland on the Carolina Plantation Rice and catch a few more recipes!


Enjoy,
Mary

© Cooking with Mary and Friends. Unauthorized use and/or duplication of this material without express and written permission from this blog’s author and/or owner is strictly prohibited. Excerpts and links may be used, provided that full and clear credit is given to Cooking with Mary and Friends with appropriate and specific direction to the original content.

Monday, August 1, 2016

Savory Roasted White Polenta


On a farm day outing in May I was finally able to meet and talk to the fine folks from The Congaree Milling Company. I had followed their progress and Facebook page for awhile, had messaged and talked to them, but this was the first chance to actually meet them and score some of their polenta and grits! I was excited to try it.

Well, as sometimes happens in life, things in my world quickly got busy and my Roasted White Polenta was patiently chilling out in my freezer waiting for me to make some deliciousness with it. Finally that moment came and I am thrilled to share the results with you.


So who is The Congaree Milling Company? 
They are Ken DuBard, and business partner, Lawrence Burwell. It is their goal to provide the best organic maize products that can be bought on the market today. Organic corn is all we currently mill on our stone burr mill. We use a separate mill for processing our organic oats  Our freshly milled, unenriched, organic, whole-grain stone-ground products are processed in ways that are both ancient and modern, ways that utilize the inherent nutrition in maize while simultaneously enhancing flavor. This untapped potential makes The Congaree Milling Company unique in its vision.

We specialize in New and Old World milling techniques that date back to when corn was grown to be consumed by people.

What is Polenta?
Polenta, in short, is a cornmeal porridge that is a common dish in Northern Italy (so much so that one derogatory word for Northern Italians is polentoni—the big polentas). It's frequently eaten with meats and ragù, cheese like gorgonzola, or condiments like mostarda d'uva, a grape-and-nut jam from Piedmont. It can either be eaten freshly cooked, much like a thick porridge, or it can be cooled and then sliced and fried, grilled, or baked. See more from Serious Eats


RECIPE
Savory Polenta
Ingredients
2 tbls olive oil, plus extra for grilling or frying
3/4 cup finely chopped onion
2 cloves garlic, finely minced
1 quart chicken stock or broth (make your own)
1 cup roasted white polenta (I used polenta from The Congaree Milling Company)
3 tbls unsalted butter
1 1/2 tsp kosher salt
1/4 tsp freshly ground black pepper
1/3 cup Parmesan, grated

Method
Preheat oven to 350 degrees F.

In a large, oven-safe saucepan heat the olive oil over medium heat. Add the onion and salt and sweat until the onions begin to turn translucent, approximately 4 to 5 minutes. Reduce the heat to low, add the garlic, and sauté for 1 to 2 minutes, making sure the garlic does not burn.
Turn the heat up to high, add the chicken stock, bring to a boil. Gradually add the cornmeal while continually whisking. Once you have added all of the cornmeal, cover the pot and place it in the oven. Cook for 35 to 40 minutes, stirring every 10 minutes to prevent lumps. Once the mixture is creamy, remove from the oven and add the butter, salt, and pepper. Once they are incorporated, gradually add the Parmesan.

Pour the polenta into 9-inch round cake pan lined with aluminum foil or parchment paper. Place in the refrigerator to cool completely, about 2-3 hours.

Once set, turn the polenta out onto a cutting board and cut into squares, rounds, or triangles. Brush each side with olive oil and fry in a nonstick skillet over medium heat, or grill.


Serve polenta topped with an Onion Marsala Wine Sauce for an added treat. In a medium saucepan, saute' 1/2 cup chopped onions in 1 tbls olive oil; sprinkle in 2-3 tbls. flour and quickly whisk in about 1 cup Marsala wine; stir until smooth and slightly thickened.


Enjoy,
Mary

© Cooking with Mary and Friends. Unauthorized use and/or duplication of this material without express and written permission from this blog’s author and/or owner is strictly prohibited. Excerpts and links may be used, provided that full and clear credit is given to Cooking with Mary and Friends with appropriate and specific direction to the original content.