Showing posts with label Main Dish. Show all posts

Friday, March 27, 2015

Honey-Teriyaki Chicken Tenders and Broccoli


I love Asian inspired tastes and flavors, so the other night I made these Honey-Teriyaki Chicken Tenders adding some diced celery and fresh broccoli florets towards the end of the baking time. Easy, peasy, and so good.

Ingredients
Boneless, skinless chicken breasts cut into tenderloin strips
1/2 cup honey
1/4 cup Teriyaki Sauce
1 stalk celery, diced
1 small head fresh broccoli, cut into florets
Rice, cooked


Method
Preheat oven to 400 degrees. Spray a covered casserole dish with cooking spray. Place chicken tenderloin strips in casserole dish.

Mix honey and Teriyaki sauce together in a small bowl and pour over chicken.

Cover and bake 30 minutes or until chicken is cooked through.  Add celery and broccoli; continue to cook 10 minutes or until vegetables are al dente.

Stir to coat well with sauce and serve over hot, cooked rice.

Enjoy,
Mary


Sunday, March 22, 2015

Low Country Shrimp and Grits


Inspired by local South Carolina seafood and cuisine, I finally decided to tackle a Low Country Shrimp and Grits recipe and see what I could come up with.

I'm a huge advocate of supporting local farms and markets, so it's no surprise I chose South Carolina Wild Caught Shrimp I recently purchased from Off the Hook Seafood Market for this dish, and stone ground grits from Palmetto Farms.

Additionally I used Chesapeake Bay Rub, a spice blend from a chef friend of mine, Adam, of Fein Tasting Foods. The results are amazing. 


RECIPE
Ingredients
For the grits:
1 cup stone ground grits
3 1/2 cups water
1 cup chicken stock
1 1/4 tsp. kosher salt
2 tbls. butter
2/3 cup shredded sharp cheddar cheese
1/3 cup grated Parmesan cheese
Course ground black pepper, to taste

For the shrimp:
1 1/2 lb. large shrimp, peeled and deveined
2 tbls. olive oil
Salt and freshly ground pepper, to taste
2-3 tsp. Chesapeake Bay Rub
2 garlic cloves, minced
4 tsp. fresh lemon juice
1 1/2 tsp. hot sauce sauce
1/3 cup white wine
few dashes parsley flakes

Method
To prepare the grits, in a large sauce pan over medium heat, combine the grits, water, chicken stock, salt, and butter and bring to a boil. Reduce the heat to low, cover and simmer, stirring occasionally, until tender, 25-30 minutes. Remove from the heat and stir in the cheddar and Parmesan cheeses, and course-ground pepper.

Peel and devein shrimp. In a fry pan over medium-high heat, warm the olive oil. Toss in the garlic and saute' until the garlic is just slightly browning.

Add the shrimp, Chesapeake Bay Rub, salt and pepper, stirring well. Add white wine, lemon juice and hot sauce; cook until shrimp is pink and heated through.

Remove from heat and serve over grits. Sprinkle on some parsley flakes; serve immediately.

Yield: 4-6 servings

Enjoy,

Mary

Wednesday, March 11, 2015

Grilled Pheasant with Raspberry Balsamic Vinaigrette


Not too long ago a group of us headed out the the Winter Farmer's Market at Coastal Coffee Roasters in Summerville, South Carolina.

It was a nice, but cold, January day, and all of us were anxious to see some of our favorite farm friends at this winter market, as well as meet a few new ones. The Winter Market at Coastal Coffee Roasters is a very nice market with a variety of things offered, making it a Saturday destination well worth checking out for yourself.

I reached out to David Gravelin, of Wishbone Heritage Farms prior to our trip, and he offered me an awesome deal on 2 Pheasants he had left in his freezers he wanted to clear out to make way for the new season. I happily accepted and offered the 2nd one to a friend of mine.

On the first warm day this Spring, we fired up the grill and prepared our pheasant feast!


Ingredients
1 Pheasant, split in half
1 tbls olive oil
Salt and pepper to taste
Raspberry Balsamic Vinaigrette (click for recipe)

Method
Turn grill on to direct medium high. Rub pheasant all over with olive oil and sprinkle well with salt and pepper on both sides. Grill, turning occasionally for 20 minutes. Liberally brush Raspberry Balsamic Vinaigrette on both sides of pheasant and continue grilling 10 minutes, basting on more vinaigrette several times. Grill until pheasant is cooked through, and internal temperature is 165 when tested with a digital read thermometer.

Serve immediately with roasted root vegetables, or your choice of sides.


Enjoy,
Mary

Thursday, February 19, 2015

What to do with a Whole Chicken?


One of the easiest and most economical things you can do is buy a whole chicken and cut it up yourself.

When you buy a chicken at the grocery store, organic or otherwise, or your local farm (preferred), you are paying for the butcher or processor to have those nice breasts or thigh pieces already cut for you. Why pay them when it's so easy to do it yourself?


Monday, February 9, 2015

Cheesy Baked Ziti


This is one dish that's so easy to make. I love to make this using my Simple Pasta Sauce.  Typically it makes enough to serve spaghetti one night and this Cheesy Baked Ziti another night later in the week.

This is an easy, simple dish; just add some cheese and you're ready to bake it.

Ingredients
2 cups Ziti noodles, cooked al dente
2 cups simple pasta sauce
1/2 cup Parmesan cheese, divided
2 cups shredded mozzarella cheese, divided
1 cup shredded Mexican cheese blend or Italian cheese blend


Method
Preheat oven to 350. Mix cooked Ziti noodles with simple pasta sauce.

Spray a 9 x 9-inch baking dish with cooking spray. Layer 1/2 of of the Ziti noodle/pasta sauce mix on the bottom. Top with 1/4 cup Parmesan cheese and 1 cup mozzarella cheese. Repeat  layers one more time with remaining ingredients. Top with 1 cup Mexican cheese blend or Italian cheese blend.

Bake 30 minutes covered. Remove cover and continue to bake 15 minutes more.

Serve immediately.

Yield:  4 servings

Cook's note - this dish freezes well; or wrap it and freeze it before baking then you'll have it already done for an easy dinner some other night. Better still, double the recipe and make 2; one for now, one to freeze.

Enjoy,
Mary

Sunday, February 8, 2015

Grilled Beef Tenderloin Filets


Just about nothing beats a good Beef Tenderloin Filet on the grill. They're great for a special dinner, such as Valentine's Day, a Birthday or Anniversary, and so easy to do. 
.
Did you know?

Filet mignon steak is a cut of beef from the tenderloin. The tenderloin runs down the back of a beef cow.

A beef tenderloin is large, usually weighing around 4 lbs to 6 lbs, and has two parts. The true filet mignon comes from the small circular strip that is attached to the entire tenderloin. In American butcher shops, a filet mignon steak is cut into about two-inch steaks from the entire tenderloin. But if you see filet mignon medallions on a menu, they are typically cut from the extra tender small round strip. It's this small round strip that the French word "filet mignon" is actually referring to.

Beef tenderloin is the name of the large cut of beef before it is sliced into steak. Once it is cut into steaks, those steaks are known by the French name, filet mignon.

RECIPE
Ingredients
2 Beef Tenderloin Filets
salt and course-ground pepper

Method
Liberally sprinkle both sides of the beef tenderloin filets with salt and course-ground pepper.

Sear filets, 1 minute per side, then grill on direct medium-high heat just a few minutes per side until cooked as desired. I like mine medium or medium-rare so these were cooked to an internal temperature of 135.

Remove filets from grill and let sit 5 minutes before serving to allow the juices to redistribute.

Serve with your choice of side dishes.

Meat and Poultry Temperature Guide

Enjoy,

Mary

© Cooking with Mary and Friends. Unauthorized use and/or duplication of this material without express and written permission from this blog’s author and/or owner is strictly prohibited. Excerpts and links may be used, provided that full and clear credit is given to Cooking with Mary and Friends with appropriate and specific direction to the original content.


Monday, February 2, 2015

Ossobuco with Cross-Cut Beef Shanks


When I shopped recently at the Winter Farmer's Market at Coastal Coffee Roasters, I purchased some awesome Cross-Cut Beef Shanks from Solo Verdi Meats. This beef is entirely grass-fed and comes from a very unique lineage of cattle, one I was very anxious to try.

"We work to maintain a herd with ideal genetic composition. Our cows can be linked to a subspecies of Bos primigenius taurus – the long-horned Aurochs that roamed Eastern and Central Europe during the Bronze Age.

Solo Verdi Meats unique Romagnola and RomaCross lineage make for naturally tender, delicately marbled beef. Our farm is located in the heart of the Southern Lowcountry region of South Carolina in the small farming community of Varnville. 


Unlike many other farms and beef producers, our cows are all born, raised, and finished here on premium quality grasses. There is no corn, no soy, and no wheat – absolutely no grain of any type – in their diet. While many farms will give grain to their grass-fed livestock during the last weeks of their life, a process called on-farm grain finishing, we prefer to preserve the quality and nutritional value of our beef product. 

Maintaining our farm at the highest standard of care means that our livestock receive the utmost humane treatment. Our cows roam freely on lush, liberally-fenced pastures. Our happy herd lives a highly social and stress-free life, something that improves their quality of life as well as the quality of the finished product."

I have never prepared Ossobuco before, but I knew it was slow cook and braised in beef broth and wine, so I turned to my good friend, Barbara, at Sunday at the Giocometti's for a "tried and true" recipe.

What is Ossobuco? It is a Milanese specialty of cross-cut veal or beef shanks braised with vegetables, white wine and broth.


RECIPE
Ingredients for 2
2 cross-cut beef shanks with bone marrow (I used beef shanks from Solo Verdi Meats)
2 tsp. sea salt
2 tsp.black pepper
1 cup flour
1 large carrot (about 3/4 cup diced)
1 large celery rib (about 3/4 cup diced)
1/2 sweet onion (about 1/2 cup diced)
1 large clove of smashed garlic (I used minced garlic)
3 tbls. olive oil
1 tbls. vegetable oil
1 tbls. butter
1 small can tomato paste
1 cup of white wine
2 cups beef stock or vegetable stock (I used homemade beef bone broth)
Optional: Add 1 tbls. herbs such as sage and thyme or rosemary. 


Method:
Preheat oven to 300.

Dry your beef shanks thoroughly with paper towels, and pepper your beef generously. If desired, tie your beef shanks with kitchen string, which will keep the meat from coming away from the bone while cooking. Dredge the beef and coat well in flour.

Heat the olive oil and vegetable oil in a large, heavy fry pan or Dutch oven. Make sure it's deep enough to hold your liquids. Brown the beef on all sides on medium to low heat, being careful not to burn.

Remove the beef from the pan and cover loosely. In the meantime, add your onion and minced garlic and saute until fragrant and somewhat translucent.

Add your celery and carrot and mix.  Give it a pinch of salt and put the lid on the pan.  Turn the heat to low for a few minutes and cook until the vegetables are fragrant and soft. Add your beef back to the pan and give them a turn, adding the wine, broth, herbs, tomato paste and butter. Cover pan with lid.

Move fry pan or Dutch oven to the oven and cook for about 2 1/2 hours. After 2 hours remove the lid and give it a turn. Return to oven and let cook the additional 1/2 hour uncovered.

Test for tenderness by sticking a fork into the beef. It should be very tender, and easily pass through.

If you tied your shanks with kitchen string, be sure to remove it before serving.

Serve Ossobuco over some pasta or rice with the sauce spooned on top.


Serves: 4

Recipe adapted from Sunday at the Giocometti's

Enjoy,
Mary

© Cooking with Mary and Friends. Unauthorized use and/or duplication of this material without express and written permission from this blog’s author and/or owner is strictly prohibited. Excerpts and links may be used, provided that full and clear credit is given to Cooking with Mary and Friends with appropriate and specific direction to the original content.

Saturday, January 17, 2015

Old-Fashioned Beef Pot Roast


 Probably one of my all-time family favorites is Pot Roast. It's easy, it cooks slowly in the slow cooker, and it's a fabulous "one pot" meal = easy clean-up and I love "fix it and forget it" dinners.

What made this even better tonight was the BEEF! Grass-fed Angus Beef from Hill Creek Farms - Hartsville, a local to me farm, I personally visited in 2014, and have visited many more times since. At that time, a friend of mine and I purchased a side of beef we shared, and it has been worth every penny we paid.


For the price per lb., we got roasts, steaks, tenderloins, stew beef, ground beef and everything in-between. It's all been wonderful, and something I would do again and again and again. Why? The taste is far superior to store-bought and I know how they were raised, with no antibiotics or added growth hormones. You can read all about my trip to Hill Creek Farms - Hartsville here.


RECIPE
Ingredients
1 beef chuck roast
1/4 cup Copycat Lipton Onion Soup Mix from my friend, Ann, at The Fountain Avenue Kitchen
1 small can tomato paste
1/2 cup red wine
4 cups beef bone broth (or beef broth)
2 tbls. minced garlic
2 tsp. dried thyme leaves
salt and pepper to taste
6 medium-sized Red or Yukon Gold potatoes, peeled
6 - 8 carrots, peeled and cut in half

Method
Spray or lightly oil a large slow cooker. Place onion soup mix, tomato paste, red wine and beef bone broth in slow cooker and whisk lightly to blend. Add chuck roast and ladle some of the mix over top. Cover and cook on low 6 hours.

Add whole peeled potatoes and peeled carrots and continue cooking on low approx. 2 hours or until vegetables are tender.

Remove roast and vegetables from slow cooker to a large serving platter. Ladle some of the "gravy" or cooking liquid over top, or serve the gravy with the roast at the table.

Enjoy,
Mary

© Cooking with Mary and Friends Unauthorized use and/or duplication of this material without express and written permission from this blog’s author and/or owner is strictly prohibited. Excerpts and links may be used, provided that full and clear credit is given to Cooking with Mary and Friends with appropriate and specific direction to the original content.


Monday, January 5, 2015

Deep Fried Pork Chops


Sometimes there's just nothing better than a deep fried pork chop. Of course, you can cut the bone off the chop if you want, but I personally enjoy the flavor it imparts and none of us mind gnawing the pork chop off the bone.That's just finger lickin' good as they say.


RECIPE
Ingredients

2-4 center cut pork chops
1 cup buttermilk (make your own by adding a tbsp lemon juice or vinegar to regular milk)
1 cup self-rising flour
1 tsp. garlic powder
1 tsp. black pepper
1/2 tsp. seasoned salt
Oil for frying (your choice)


Method
Put buttermilk in a bowl. In another bowl or zip top bag, mix flour, garlic powder, pepper and salt.

Dip pork chops in the buttermilk and coat in flour mixture. Place pork chops on a cooling rack and let sit 20-30 minutes before frying (this will help the coating stick to the pork).

Pour oil into large skillet or dutch oven (I use an electric fry pan so I can control the heat) and heat to 350-400 degrees.

Place pork chops in pan and fry for 5 minutes per side or until cooked through and the internal temperature is 145.

Remove from heat and let drain on paper towels. Serve while hot.

Enjoy,

Mary

© Cooking with Mary and Friends. Unauthorized use and/or duplication of this material without express and written permission from this blog’s author and/or owner is strictly prohibited. Excerpts and links may be used, provided that full and clear credit is given to Cooking with Mary and Friends with appropriate and specific direction to the original content.

Saturday, December 20, 2014

Prime Rib of Beef Roast


Updated and Revised December 2021


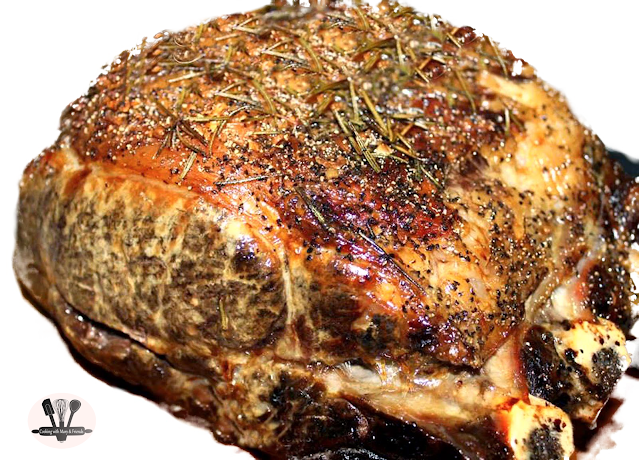
We almost always have Prime Rib of Beef Roast during the holidays, typically for Christmas Eve dinner. When prepared and cooked properly nothing beats it. Traditionally served with Yorkshire Pudding and au jus or gravy, it's a family favorite.


This year we were fortunate to be able to purchase our Prime Rib of Beef from West Ridge Farms- Premium Beef 
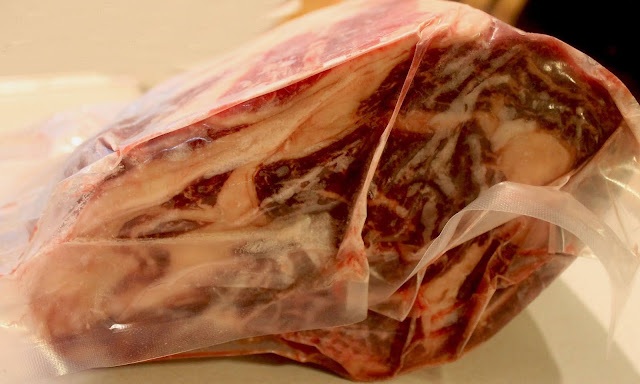
but no matter where you purchase it, look for a piece well marbled. Choose a rib roast that has a bright color with milky white fat. Avoid dull-colored meat and yellow fat.

Butcher shops many times will cut the ribs off the roast, then tie them back on, for easier carving. This is usually done at no cost, and I personally love the bones on the rib roast because they impart so much flavor. Don't forget to save the bones to make delicious Beef Bone Broth. That bone broth can be used with leftover shaved pieces of prime rib for delicious French Dip or open faced sandwiches. #useitall #zerowaste


A full rib roast can be up to seven bones. If you are doing a smaller roast, then ask your butcher to cut your roast from the small end. The small end is closer to the loin and the large end is closer to the chuck. This means that generally, the small end is more tender and more desired. Now that you know, you can be one of the smart people, getting a better roast. 😀


Did you know?  Prime Rib or Standing Rib Roast is a cut of beef from the primal rib, one of the nine primal cuts of beef. While the entire rib section comprises ribs six through 12, a standing rib roast may contain anywhere from two to seven ribs.

It is most often roasted "standing" on the rib bones so that the meat does not touch the pan. An alternative cut removes the top end of the ribs for easier carving.


Most people think that the word "Prime" in Prime Rib means it is USDA Prime Grade. But unless the official USDA designation is attached to the rib roast, it is not USDA Prime certified. The word "Prime" by itself only describes the most desirable part of the "rib section" of the beef regardless of the USDA (US Department of Agriculture) Grade.


The top grades of beef are USDA Prime, USDA Choice and USDA Select with Prime being the most superior. 


A Prime Rib Roast is also often referred to as "Standing Rib Roast." It is cut from the rib section which is one if the eight primal cuts of beef and is comprised of ribs 6 through 12 and a standing Prime Rib Roast can be 2 to 7 ribs. Once roasted to the desired temperature, it is sliced into portions which are called "Prime Rib."


It is interesting to note that a slice of uncooked prime rib roast is really a "rib steak" which includes the "rib eye" portion.


RECIPE 
Ingredients
1 Prime Rib Roast 
1 tbls. olive oil
1-2 tsp. minced garlic
2-3 fresh rosemary sprigs (optional)
Course-ground black pepper

Method
Remove roast from the refrigerator and let it come to room temperature about 1 hour prior to roasting. Lightly oil the roast all over with olive oil. Rub on minced garlic, sprinkle well with pepper and top roast with 2-3 sprigs fresh rosemary.

Preheat oven to 450. Place roast rib side down, fat side up, so roast is "standing up" in roasting pan. Sear roast for 15 minutes.

Reduce heat to 325 for the remainder of the cooking time. Time will vary dependent on size of roast, however the roasting time is approximately 13-15 minutes per pound. 

For optimal flavor and texture, cook prime rib to:
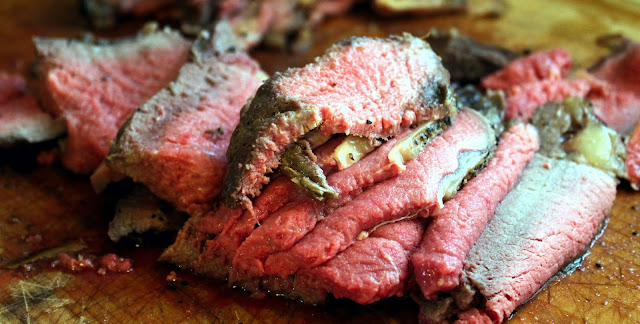
  • medium rare or an internal temperature of 130-135. Remember the internal temperature will rise as the roast rests. 
  • If you want it more well done, cook it a few minutes longer, or until the internal temperature is 140-145. 
When checking the temperature of your prime rib roast, insert meat thermometer so tip is in thickest part of beef, not resting in fat or touching the bone.

Remove roast from oven, cover lightly with foil and let rest 15-20 minutes before carving; and longer if you're going to make some Yorkshire Pudding.


Enjoy,

Mary

© Cooking with Mary and Friends. Unauthorized use and/or duplication of this material without express and written permission from this blog’s author and/or owner is strictly prohibited. Excerpts and links may be used, provided that full and clear credit is given to Cooking with Mary and Friends with appropriate and specific direction to the original content.

Monday, December 1, 2014

Greek Pastitsio


This Greek Pastitsio was so good tonight with ground lamb from Thames Farm. Macaroni noodles, oregano, cinnamon, onion, garlic and a Bechamel Sauce with some added Parmesan cheese all come together in this delicious, yet easy, dish.

Situated on 82 rolling acres Thames Farm is dedicated to raising healthy all-natural pastured Berkshire pork, pastured chicken and lamb. All our animals are raised on a natural diet and are never given antibiotics, steroids or any growth hormones. Our pastures are maintained chemical free.

And that is why I shop there often ... 

Ingredients
1 cup uncooked elbow macaroni
1 lb. ground lamb (turkey or beef may be substituted)
1 medium onion, chopped
1 garlic clove, minced
1 - 8 oz. can tomato sauce (make your own)
1 tsp. salt, divided
1 tsp. dried oregano
1/2 tsp. black pepper
1/4 tsp. ground cinnamon
1/2 cup grated Parmesan cheese, divided
3 tbls. butter
3 tbls. all-purpose flour
1-1/2 cups milk
1 egg, lightly beaten

Method
Cook macaroni according to package directions. 

Meanwhile, in a large skillet, cook beef and onion over medium heat until meat is no longer pink. Add garlic; cook 1 minute longer. Drain. Stir in the tomato sauce, 1/2 teaspoon salt, oregano, pepper and cinnamon; heat through.

Drain macaroni; place half of macaroni in a greased 9-in.-square baking pan. Sprinkle with 1/4 cup cheese. Layer with meat mixture and remaining macaroni. Set aside.

Preheat oven to 350 degrees. 

In a small saucepan, melt butter; stir in flour and remaining salt until smooth. Gradually add milk. Bring to a boil; cook and stir 2 minutes or until thickened.

Remove from the heat. Stir a small amount of the hot mixture into egg; return all to the pan, stirring constantly. Bring to a gentle boil; cook and stir 2 minutes. Remove from heat; stir in remaining cheese. Pour sauce over macaroni.

Bake, uncovered, 30-35 minutes or until golden brown. Let stand 10 minutes before serving. 

Yield: 4-6 servings

Enjoy,
Mary


Monday, November 24, 2014

Mexicali Shepard's Pie


I saw a recipe the other day I just knew I wanted to make.  The recipe was for this Mexicali Hash Brown Taco Casserole by The Midnight Baker. It had all the ingredients I wanted to try, but I also knew I wanted to make it my own, so this is my take on it.

Recipe
Ingredients
1 lb. ground beef
2 tsp. dried minced onion
1 tsp. chili powder
1 tsp. garlic powder
1/2 tsp. cumin
1 tsp. black pepper
1/4 tsp. dried cayenne
1/2 cup salsa
2 cups niblet corn
6-8 pickled jalapeno slices
2 cups Mexican cheese blend, divided
2 russet potatoes, peeled and shredded

Method
Preheat oven to 350 degrees.

In a fry pan, brown ground beef with minced onion until beef is cooked through.  Add all spices, salsa, corn, jalapeno slices, and 1 cup of the Mexican cheese blend.  Put mixture in 7 x 11-inch pan sprayed with cooking spray.

Peel and shred 2 russet potatoes with a box grater and rinse well with cold water. Mix potatoes with additional 1 cup Mexican cheese blend, and press on top of ground beef mixture.

Bake 30-35 minutes or until cheese is bubbly and potatoes are browning.  Let cool 5 minutes before slicing and serving.

Note - this is a spicy dish; feel free to adjust the seasonings to suit your taste

Yield:  4-6 servings

Enjoy,
Mary

© Cooking with Mary and Friends. Unauthorized use and/or duplication of this material without express and written permission from this blog’s author and/or owner is strictly prohibited. Excerpts and links may be used, provided that full and clear credit is given to Cooking with Mary and Friends with appropriate and specific direction to the original content.

Thursday, November 20, 2014

Crispy Cheddar Chicken Tenders


So I made this recipe I saw the other day online.  In addition to the baking mix and cheddar cheese, it also called for cooked and crumbled bacon pieces.

I tried it at first with the bacon pieces, but I can tell you from my experience, the bacon crumbles simply did not adhere to the chicken, so I opted to just go for it without the added bacon.  Worked like a champ and the tenders had an awesome cheddar cheese taste.

Ingredients
8-10 chicken tenders (or boneless chicken breasts cut into strips)
1 1/3 cup baking mix (like Bisquick)
1 cup finely shredded cheddar cheese
1 tsp. garlic salt
1 tsp. black pepper
1 tsp. paprika
2 eggs, beaten

Method
Preheat deep fryer to 375 degrees (or put about 1 cup oil in a large skillet to fry).

Combine baking mix, shredded cheddar cheese, garlic salt, black pepper and paprika in a large zip-top bag, shaking well to mix.

Beat eggs in a shallow bowl, and dip half the chicken tenders in the egg, then add them to the zip-top bag, seal bag and shake to coat.  Remove tenders to a cooling rack.

Repeat with remaining chicken tenders and allow to rest 30 minutes before frying (this helps the coating stick to the chicken).

Fry chicken tenders in batches for approx. 8-10 minutes, or until cooked through. Remove tenders from fryer and let drain on paper towels.  Keep warm in the oven set on 170 degrees while the remaining tenders are frying.  Serve immediately.

Yield:  4-5 servings

Enjoy,
Mary


Monday, November 17, 2014

Beef Shoulder Roast


A beef-shoulder roast is an inexpensive roast cut from the muscled shoulder area of the beef. The tough, slightly chewy shoulder roast dries out easily but benefits from moist-cooking methods such as braising, which tenderizes the roast as it simmers slowly in liquid. 


Braising a shoulder roast in liquids such as broth, apple juice or even beer or wine turns even the toughest roast beef into a flavorful, fork-tender dish. Economical and delicious, this roast is perfect for a Sunday dinner.


RECIPE
Ingredients
1 Beef shoulder roast (100% grass-fed beef preferred)
6-8 potatoes, peeled and left whole
Rutabaga, carrots or other root vegetables of your choice, peeled and cut into large pieces
1 large onion, peeled and quartered
1 tsp. thyme leaves
1 tsp. salt
1 tsp. course-ground black pepper
1 tsp. garlic powder
1/2 cup flour
2 cups beef broth (I used beef bone broth)
1 cup red wine

Method
Preheat oven to 350 degrees and spray a large roasting pan with cooking spray.

Place beef shoulder roast in pan and season on both sides with thyme leaves, salt, pepper and garlic powder.

Arrange potatoes and other root vegetables around the roast.  Sprinkle flour over all and pour beef broth and red wine in pan (this will make the pan gravy).

Cover pan tightly with foil and roast 2 1/2 hours. Uncover roast, stir pan gravy, and continue cooking an additional 30 minutes.

Remove roast, potatoes and root vegetables to a platter and serve immediately with pan gravy.


Enjoy,
Mary

© Cooking with Mary and Friends. Unauthorized use and/or duplication of this material without express and written permission from this blog’s author and/or owner is strictly prohibited. Excerpts and links may be used, provided that full and clear credit is given to Cooking with Mary and Friends with appropriate and specific direction to the original content.

Friday, November 14, 2014

Stuffed Pork Chops


This recipe has been around in my family for a long time.  Rather than stuffing the pork chops by cutting a slit in the side, the stuffing sits on top.

The pork chops and stuffing are then covered in cream of mushroom soup and baked until tender.

One of my husbands favorite meals and one I hope you will enjoy it as well.

Ingredients
2 one-inch thick center cut pork chops (mine were from Sunny Cedars Farm)
1/2 loaf of soft white bread, torn into small pieces
1/4 butter, melted
1 cup chicken stock
1 onion, chopped
2 tsp. poultry seasoning
1 tsp. parsley leaves
salt and pepper to taste
1 can cream of mushroom soup
1/2 cup milk


Method
Preheat oven to 350 degrees.

In a large bowl combine bread torn into small pieces, onion, poultry seasoning, parsley leaves, salt and pepper to taste.

Heat chicken stock and butter in the microwave 1 minute or until butter is melted.  Pour over bread mixture and stir to combine.

Spray a 13 x 9 -inch baking dish with cooking spray and place pork chops in dish. Sprinkle salt and pepper over chops and top with a spoonful of stuffing, making sure it is well compressed over the top of the pork chops.

Mix 1 can cream of mushroom soup with 1/2 cup milk until well combined; pour mixture over pork chops and stuffing.

Bake, uncovered 1 hour.  Serve immediately.

Enjoy,
Mary


Monday, November 10, 2014

Grilled Rack of Lamb #2


This Grilled Rack of Lamb was so easy to do with just some garlic and rosemary snipped fresh from the garden.

Lamb goes well with grilled or roasted potatoes and carrots, or any of your favorite root vegetables, making it a simple yet elegant meal.

Of course, it's always best to purchase lamb from your local farmer. In this instance, the lamb I used came from Thames Farm, a wonderful, small family farm I shop from quite often.  All of their animals are raised on a natural diet and are never given antibiotics, steroids or any growth hormones, and the pastures are maintained chemical free. 

Ingredients
1 Rack of Lamb
2 cloves garlic, crushed
1 sprig fresh rosemary, leaves snipped
salt and pepper

Method
Rub garlic, rosemary, salt and pepper all over the lamb. 

Place the rack of lamb on a preheated grill over indirect medium heat. 

Grill meat side down 7-10 minutes, turn to rack side down, and grill 10-15 additional minutes or until the internal temperature is 145 degrees. 

Remove from grill, let rest 5 minutes before serving.

Lamb safe cooking temperatures


Enjoy,
Mary

Tuesday, November 4, 2014

Dinner for Two: Pork au Poivre


Updated February 2021

From my Cuisine at Home magazine: 

"Inspired by classic French cuisine, Pork au Poivre has a generous coating of cracked peppercorns that’s seared to create a crisp, flavorful crust. Although traditional steak au poivre is served with a simple (sometimes creamy) pan sauce, a smooth brandy sauce makes this pork feel like a luxury dinner."

Buy the nicest 1" 
inch thick center-cut pork chops you can find. I made this delicious Pork au Poivre with pasture-raised pork chops I purchased from a small local to me farm, Sunny Cedars Farm

What do you need to make Pork au Poivre?
  • Two 1-inch thick center-cut pork chops
  • Chicken broth
  • White wine vinegar
  • Olive oil
  • Brandy
  • Fresh Thyme
  • Peppercorn mélange*
  • Butter


RECIPE
COAT:
2 boneless pork loin chops (6–8 oz. each), seasoned with salt
1/4 cup peppercorn mélange, crushed
HEAT:
2 Tbsp. olive oil
DEGLAZE:
1/3 cup brandy
ADD:
1/3 cup low-sodium chicken broth
1/2 tsp. white wine vinegar
1/2 tsp. chopped fresh thyme
3 Tbsp. unsalted butter, cubed


Method
Preheat oven to 375°. Coat both sides of pork chops with peppercorns. Heat oil in a sauté pan over medium-high until it shimmers.

Add pork chops and sauté until browned, about 2 minutes per side. Transfer pan to oven and roast pork until an instant-read thermometer inserted into the thickest part registers 145°, about 7–10 minutes.

Transfer pork chops to a plate; tent with foil.

Deglaze pan with brandy, scraping up any brown bits; cook over medium-high heat until liquid nearly evaporates, 2 minutes.

Add broth, vinegar, and thyme to pan and reduce, 4 minutes more. Off heat, whisk in butter, 1 cube at a time, adding more only when the butter melts.

Serve sauce over pork.


*PEPPERCORN MÉLANGE
A peppercorn mélange is a blend of black, white, green, and pink peppercorns. Black, white, and green peppercorns come from the same plant but are harvested at different points in their ripening stage, creating different flavor profiles. Pink peppercorns are not peppercorns, but sweet and pepper-like dried berries that work well in blends.

Serves:  2

Enjoy,

Mary

© Cooking with Mary and Friends. Unauthorized use and/or duplication of this material without express and written permission from this blog’s author and/or owner is strictly prohibited. Excerpts and links may be used, provided that full and clear credit is given to Cooking with Mary and Friends with appropriate and specific direction to the original content.

Monday, November 3, 2014

Herbed Grilled Chicken


These Boneless, Skinless Chicken Breasts from Thames Farm are simply delicious. In our house, we have really enjoyed the pastured meats we have purchased from our small, local, family farms. One, because the taste is superior to conventionally produced meat, and two, because we enjoy supporting local where we can.

Ingredients
2 - 4 boneless, skinless chicken breasts
Herb blend (parsley, basil, chives, garlic, onion flakes, black pepper and your choice of other herbs and spices)

Method
Thaw chicken breasts, and liberally spread with herbs, rubbing well into the chicken.

Grill chicken breasts on direct medium heat 15 minutes per side, depending on thickness, or until internal temperature is 165 degrees.

Serve while hot with your choice of side dishes.

Yield:  2-4 servings


Enjoy,
Mary


Thursday, October 30, 2014

Grilled Rump Roast


One of the best decisions we ever made was to go in on a side of 100% Grass-Fed Angus Beef from Hill Creek Farms - Hartsville.  We split the side of beef with our friends, each of us receiving approximately 116 lbs. of beef. That's a whole lot of beef, and easily took up 2 entire shelves in my large freezer, the meat bin, and then some ... I didn't think I'd EVER find room for it all.


While some of it is in ground beef, quite a lot of it was in roasts, briskets, steaks, beef ribs, soup bones, beef liver and more, and we've enjoyed every single bite of all of it.


If you ever have the chance to buy a side of beef, do it! The taste is far superior to any store-bought meat you will ever have, and many times grades out as USDA Prime! There is less fat, a bit more marbling, and the meat is so juicy, tender and delicious, including some of the more tougher cuts.


RECIPE
Ingredients
1 - 3 lb. rump roast
Salt and pepper, to coat roast
Olive oil, to rub on roast
Minced garlic, to rub on roast

Method
Turn grill to direct high. Rub roast with oil all over and liberally coat with salt, pepper and garlic on all sides. Sear roast 10 minutes per side.

Reduce heat to medium-off-medium and roast an additional 25 minutes or until beef registers 135-140 with an internal meat thermometer, checking beef after 15 minutes, and every 5 minutes afterward.

Remove from grill, cover with foil and let rest 20 minutes. Slice thinly and serve while hot.

To Roast: Cook the roast initially at 375 for half an hour, to brown it; lower the heat to 225. Cook the roast and additional 1 1/2 to 2 1/2 hours, or until beef registers 135-140 with an internal meat thermometer. Let rest 20 minutes tented with foil after removing from the oven and before carving.

Serve with mashed potatoes and gravy, or your choice of side dishes.

Use leftover beef for French Dip Sandwiches.

See here for the Benefits of Buying a Side of Beef.

Enjoy,

Mary

© Cooking with Mary and Friends. Unauthorized use and/or duplication of this material without express and written permission from this blog’s author and/or owner is strictly prohibited. Excerpts and links may be used, provided that full and clear credit is given to Cooking with Mary and Friends with appropriate and specific direction to the original content.

Grilled Chicken Breast with Pineapple-Jalapeno Jelly Glaze


Oh my word! Some of the best chicken I've ever tasted. The pasture raised whole bone-in chicken breast from Thames Farm, paired with my Pineapple-Jalapeno Jelly was simply fantastic.

Grilled to perfection, crispy skin, moist, juicy, and tender meat, with the sweet and tangy bite of the jelly. Oh yes, this is one we'll do over and over again ... it ... was ... that ... good!

Ingredients
1 - 2 lb. whole chicken breast (I used a pasture raised bone-in chicken breast from Thames Farm)
1/2 cup Pineapple-Jalapeno Jelly (slightly heated)
Salt and Pepper

Method
Salt and pepper whole chicken breast, rubbing in with fingers to stick to the breast.

Heat grill to medium-high indirect heat and grill breast side down 20 minutes.  Turn chicken breast side down and continue to grill an additional 20 minutes.

Turn chicken breast side up and liberally baste/brush on pineapple-jalapeno jelly. Continue to grill 15 more minutes or until internal temperature reaches 165 degrees.

Remove from grill to a carving board and slice as desired.

Serve immediately with additional pineapple-jalapeno jelly, steamed rice and vegetable of your choice.

Enjoy,
Mary